


Running Microsoft Word 2016 Full Screen
My first step in configuring my standard Word writing environment is to click the square box in the upper right corner of the screen to expand the Word window to fill the screen. I always write with Word expanded to fill the screen. I only run Word in a small window when comparing the contents of two windows side-by-side.
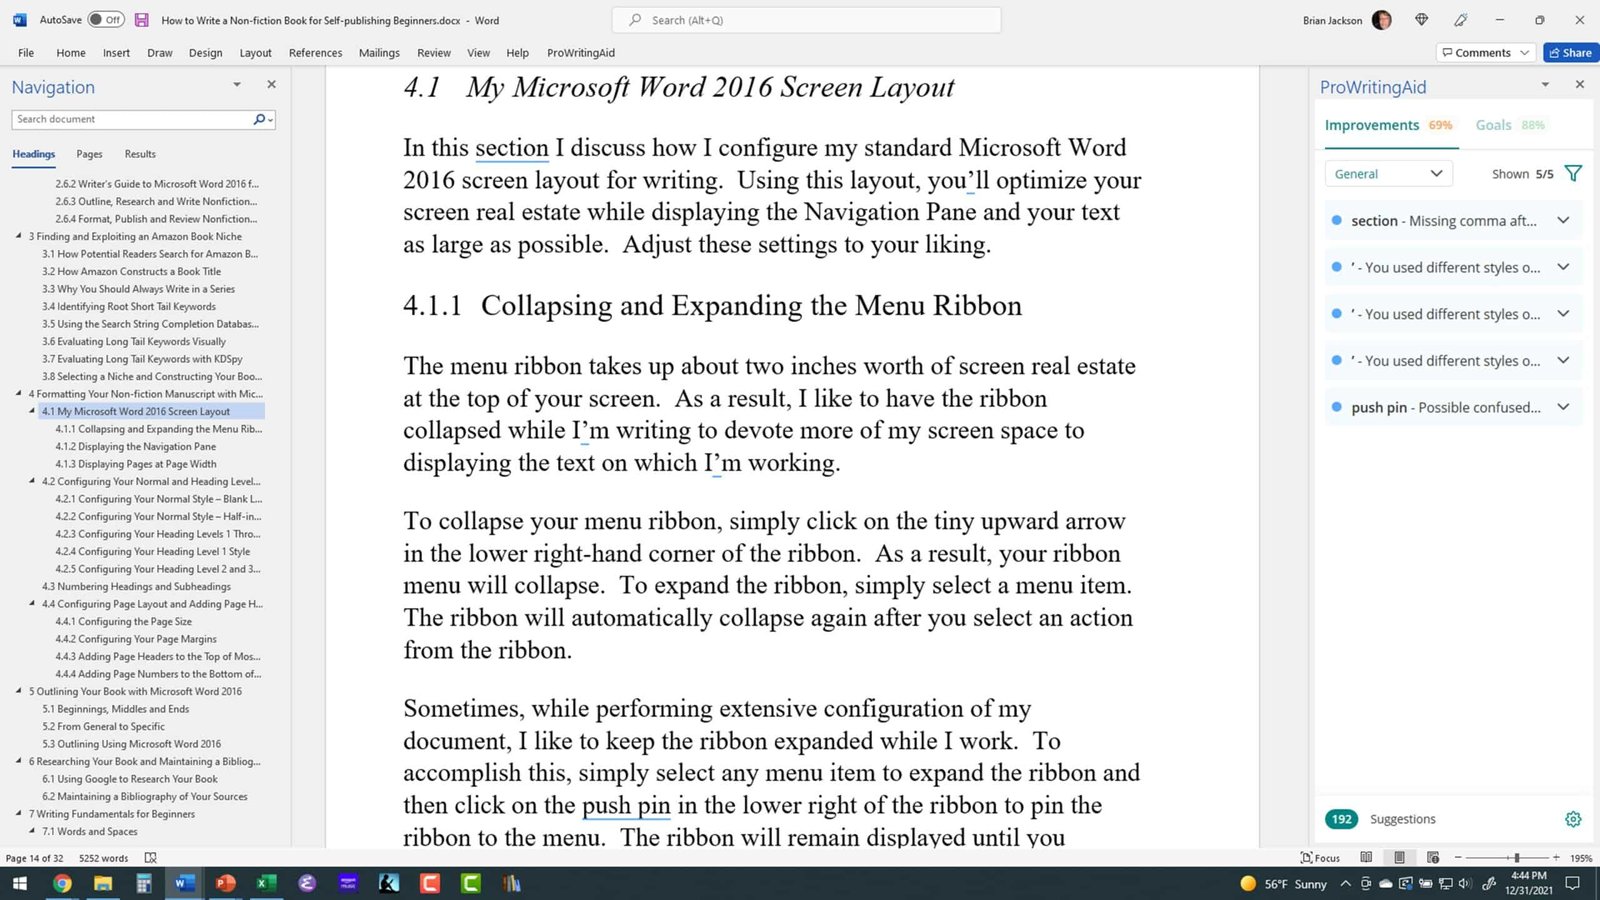
Collapsing and Expanding the Menu Ribbon
The menu ribbon takes up about two inches worth of screen real estate at the top of your screen. As a result, I like to have the ribbon collapsed while I’m writing to devote more of my screen space to displaying the text on which I’m working.
To collapse your menu ribbon, simply click on the tiny upward arrow in the lower right-hand corner of the ribbon. As a result, your ribbon menu will collapse. To expand the ribbon, simply select a menu item. The ribbon will automatically collapse again after you select an action from the ribbon.
Note: In the latest version of Microsoft Word, you need to click the downward arrow and select “Show tabs only” to collapse the ribbon.
Sometimes, while performing extensive configuration of my document, I like to keep the ribbon expanded while I work. To accomplish this, simply select any menu item to expand the ribbon and then click on the pushpin in the lower right of the ribbon to pin the ribbon to the menu. The ribbon will remain displayed until you manually collapse it.
Note: In the latest version of Microsoft Word, you need to click the downward arrow and select “Always show Ribbon” to keep the ribbon displayed.
Displaying the Navigation Pane
A handy feature of Microsoft Word 2016 that I almost always have displayed is the Navigation Pane. The Navigation Pane uses screen real estate on the left side of the screen to display all of your chapter and subchapter headings. Using this display, you can quickly review the structure of your document and jump to any section of your document by clicking on its heading in the Navigation Pane.
To display the Navigation Pane, go to the View menu and check the box “Navigation Pane” in the Show section of the ribbon. To end display of the Navigation Pane, simple uncheck the same box.
Displaying Pages at Page Width
I prefer to fill the document display area by making my document text as large as possible. To accomplish this, display the View menu ribbon and select Page Width from the Zoom section of the ribbon. Word will display your document to fill the full width of the document display window.
Other display options include One Page and Multiple Pages. Experiment with these setting to determine your favorite page display setting.
Displaying the ProWritingAid Pane
Lately, I’ve begun writing with the ProWritingAid application open in a pane to the right of the editing pane. This tool highlights spelling and grammar errors in my text as I write. This takes up additional horizontal screen realestate making the full page width display of your text look reasonable.
You can find more information on configuring and using Microsoft Word in my Udemy course, Microsoft Word 2010 and 2016 for Beginners.
I’ll see you in the classroom,
—Brian


