I use Microsoft PowerPoint as my go-to general purpose graphics editor. More specifically, I use it to create all my book covers. In this post, I explain how to use Microsoft PowerPoint to create professional quality DIY book covers.
Book Cover Dimensions
First, you should configure your book cover dimensions in PowerPoint to match the dimensions of your Print on Demand (POD) paperback. Follow these steps to configure your PowerPoint page size to 6″x9″:
- Click the “Design” menu option and select “Slide Size” and “Custom Slide Size” from the “Customize” section of the menu ribbon.
- Set your slide width to “6 in.” and your slide height to “9 in.”.

- Click OK to set your dimensions.
- Choose “Ensure Fit” when prompted.
Configuring a Background Color
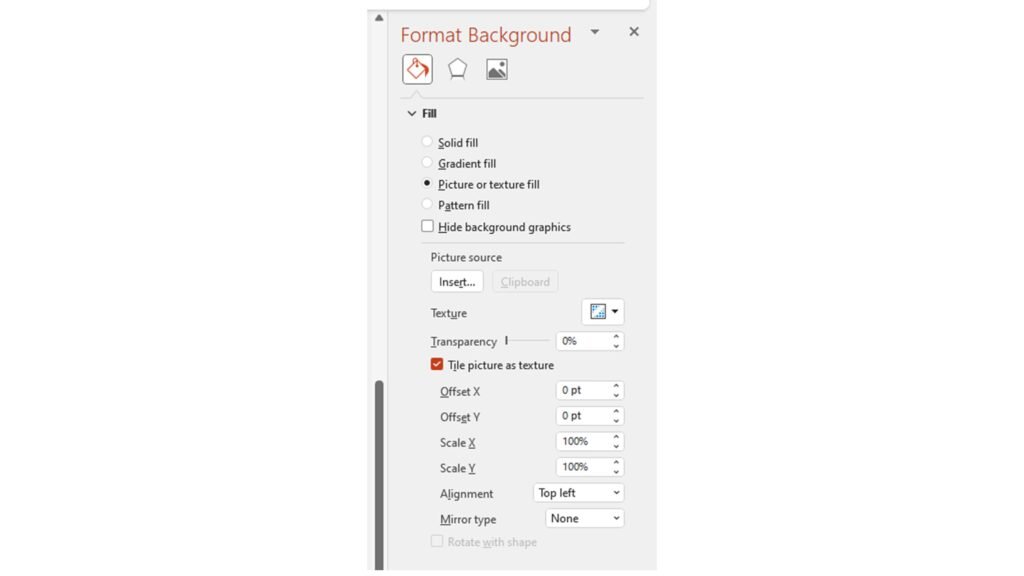
Next, right-click anywhere in the image window and select Format Background from the context menu. PowerPoint displays the Format Background pane to the right of the slide editing window. From this point onward, you have options. You can set your book cover background to a solid color, gradient, text, image, texture or pattern. The simplest thing to do is to set your book cover background to a solid color. In the following screenshot, I set my background color to off white.

Inserting a Background Image
Instead of using solid colors and gradients for your background, you can import an image to cover the entire background of your book cover. PowerPoint will crop your image to fit the slide size. To add an image to the background, select Picture or texture fill from the Format Background panel. Click Insert under Picture source and use the file selector to select your background image.

Inserting Text
Click the Insert menu tab and select Text box from the Text section of the menu ribbon to add text to your book cover. Select your text and use the controls on the Home and Shape Format menus to configure the size and color or your text. Drag the text box around the screen to position it. Select your text and use the Text Effect options on the Shape Format menu ribbon to add effects (e.g. drop shadow) to your text.
Inserting Colored Boxes
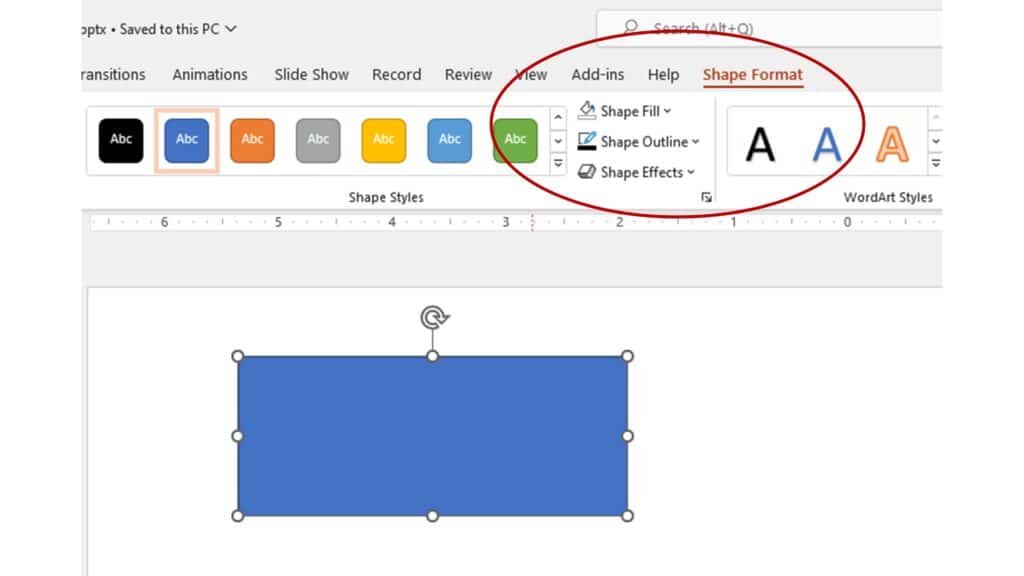
If you’re using a whole cover image, odds are your text is difficult to read when laid over a busy image. To rectify this problem, place rectangular colored boxes behind your text to make it stand out against a busy background. To insert a colored rectangle, click the Insert menu tab and select the Shapes from the Illustrations section of the menu ribbon. Click on the rectangle in the shapes dropdown menu. Finally, left-click and hold your mouse in the drawing pane to drag out your rectangle. Use the handles to resize your rectangle, then drag it to where you want it.

Use the Shape Format menu ribbon contents to apply color fill, outline and effects to your rectangle.
Working with Layers
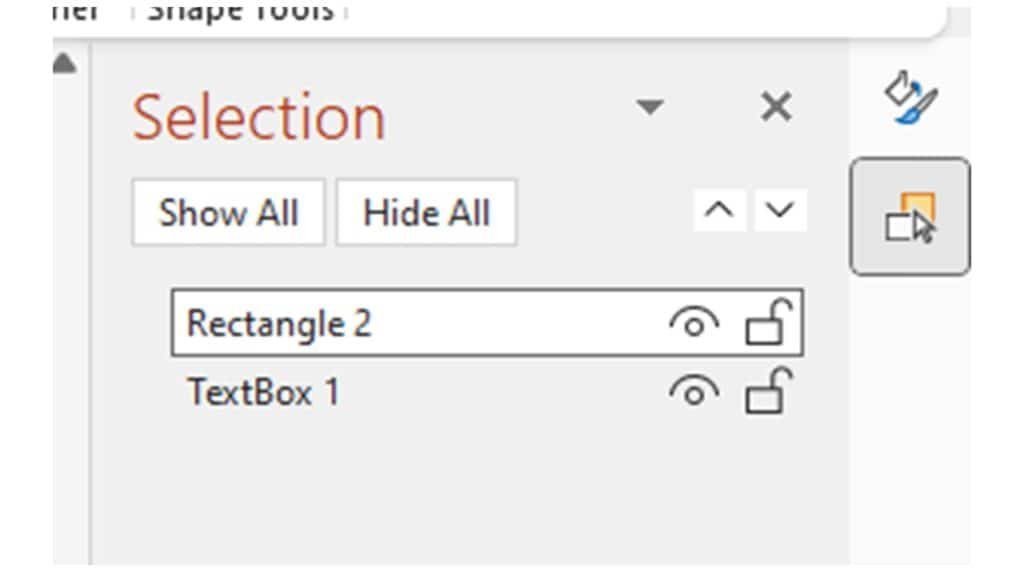
Your new colored box is probably on top of the text you want to highlight with it rather than below it. To correct this problem, display the Selection Pane and drag the box layer to below your text layer. To display the Selection Pane, click the Home menu tab and choose Selection Pane from the Select drop-down menu in the Editing section of the menu ribbon. This action will display the Selection Pane to the right of the main editing pane.

Click and drag the rectangle layer to below the text box layer and release your mouse button. You can now position your colored box below your text.
Text in Boxes
Add text to a rectangle by double-clicking on the rectangle and typing your text. Configure the text by selecting and changing it using the Home and Shape Format menu options. The text will follow your box where you drag it.

Inserting an Inset Image
Add a resizable image to your book cover by clicking on the Insert menu tab and selecting This Device from the Pictures tab in the Images section of the menu ribbon. Use the handles to resize the image and drag it around the canvas to position it. Use the Picture Format menu options to configure your image.
Saving and Exporting
Refer to the post, PowerPoint 300 DPI Book/E-book Covers, for instructions on setting your output resolution to 300 DPI on Windows 10 and exporting your book cover image.
Putting It All Together
Keep your eye out for a future post in which I walk you through the creation of the Journal book covers.

I’ll see you in the classroom,
—Brian


